How to Grout Tiles the Right Way
Tiles are the perfect option for bathroom floors, or if you want to add a stylish backsplash in the kitchen. However, once all of them are in place, you need to make sure you add grout. Since tiles have frequent exposure to water and moisture, you need the grout to add a protective layer.
When applied correctly, you can expect the grout not only to add a finished look, but it will also extend the life of your tiles. Tiling jobs can be tricky so here is a guide.
Table of Content
Gather the Materials
Regardless if you want to add grout to a floor or wall, the process is the same. It all starts with picking up all the materials you need. Thankfully, you’ll be able to find everything at a local home improvement shop.
To get started, make sure you have a tub of grout, a plastic spreader, a bucket, sponge, and a soft cloth. Before you buy the grout, make sure you understand your options. You’ll need to choose from un-sanded, sanded, and epoxy grout. Wall tile works best with un-sanded, while sanded grout works well with tile floors. Epoxy grout is a more specialised variety and can be used on both walls and floors, interchangeably.
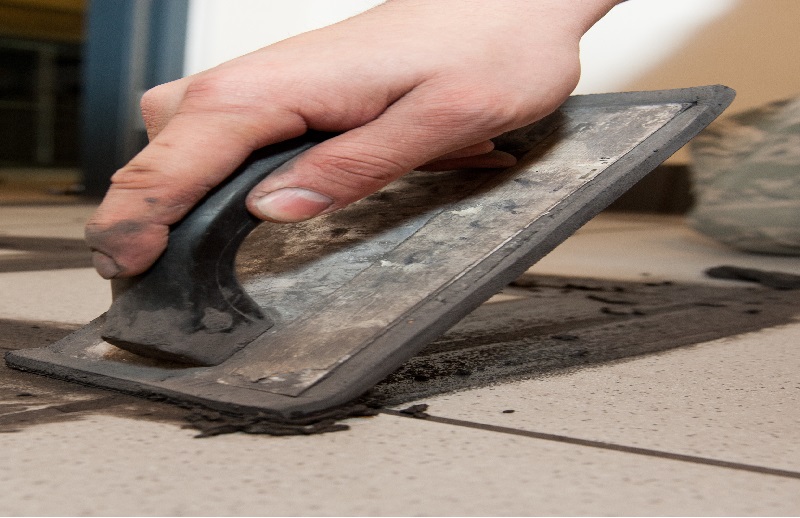
Prepare and Applying the Grout
Many types of grout come in powder form. Before you begin, make sure you mix the powder with water. Slowly add the grout to water and mix with a stick until it turns into a whipped consistency.
Once you finish mixing the grout, you can begin applying it to the tiles. Use the spreader to force the grout into the gaps between them. Keeping the spreader at a 45-degree angle will ensure enough grout gets between each groove.
Make sure you pay attention to the joints. You also need to apply enough grout in these areas. Work quickly so that the grout doesn’t dry out, and push enough of the mixture into any open gaps. Always use a sponge to wipe away any excess. You may need to apply several layers, so check the drying times before you add more grout. On average, you’ll need to wait about 10 minutes between each coat.
Sealing the Grout
After you finish applying the grout mixture, you need to add a sealant. Failure to do so will negate all your hard work. The sealer is what makes the grout waterproof and keeps out moisture. Double-check that the sealer you purchase is compatible with the grout. If you’re uncertain, ask an expert for advice.
You should apply at least two layers of sealer to ensure your tiles are waterproof. Pay close attention to the joints, as this is where water is most likely to collect. Once you finish applying the sealer, wipe off the tile and leave it to dry.
Make sure the tile has enough time to dry thoroughly before you get it wet. The grout manufacturer should have expected dry times on the container, but a good rule is to allow at least a full day for drying.
Re-grouting Tile
If you want to freshen up the look of your tiles without replacing them, you can do so by re-grouting. You’ll need a grout grater to remove the old grout effectively. It takes a bit of pressure, but this tool should quickly get out the grout. Be sure you have plenty of ventilation and wear a mask. Removing grout kicks up a lot of dust!
Once you finish removing the old grout, you need to clean and dust the tiles. Then follow the previous steps to apply fresh grout. By the time you finish, your wall or floor tiles will look like new again.